|
|
Post by vic01 on Jul 25, 2008 10:45:16 GMT -5
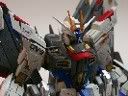
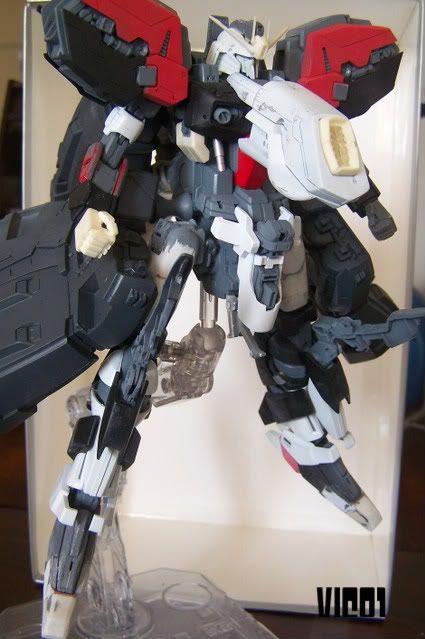
WARNING!!! PICS UNCLASSIFIED NOW...  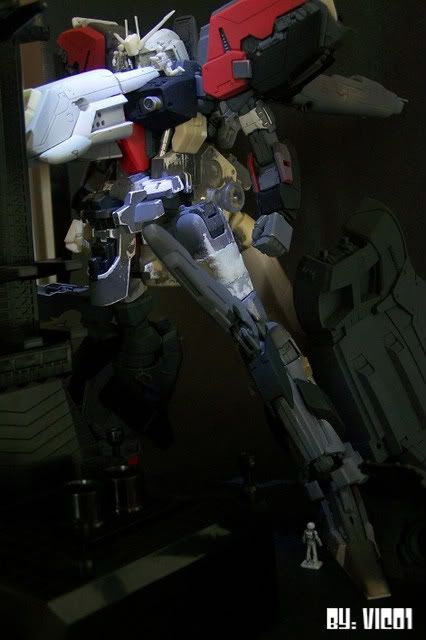 ---From unknown source... ;D Looks like building and repairs are on the way. vic01 |
|
|
|
Post by supergetterv on Jul 29, 2008 21:54:37 GMT -5
Keep it up man. Looking good. So are you using the GFF as the sample? I know you are adding LED lights to it. But what other ways are you going to customize this Gundam. A different color scheme?
|
|
|
|
Post by vic01 on Jul 31, 2008 2:55:07 GMT -5
Keep it up man. Looking good. So are you using the GFF as the sample? I know you are adding LED lights to it. But what other ways are you going to customize this Gundam. A different color scheme? There are lots of modification made on this model.  The color scheme is also different, w/ mix of black, red, gray and white. Thank you for looking! Will update as soon as I have progress. vic01 |
|
|
|
Post by vic01 on Sept 22, 2008 1:22:55 GMT -5
|
|
|
|
Post by mechamasterj on Sept 22, 2008 15:47:03 GMT -5
Impressive, i see you have scratch building skills. Cant wait to see the finished product! You have any other pictures of kits you built!
|
|
|
|
Post by vic01 on Sept 24, 2008 21:44:38 GMT -5
Impressive, i see you have scratch building skills. Cant wait to see the finished product! You have any other pictures of kits you built! Thank you! 50% complete. vic01 |
|
|
|
Post by vic01 on Sept 26, 2008 20:43:52 GMT -5
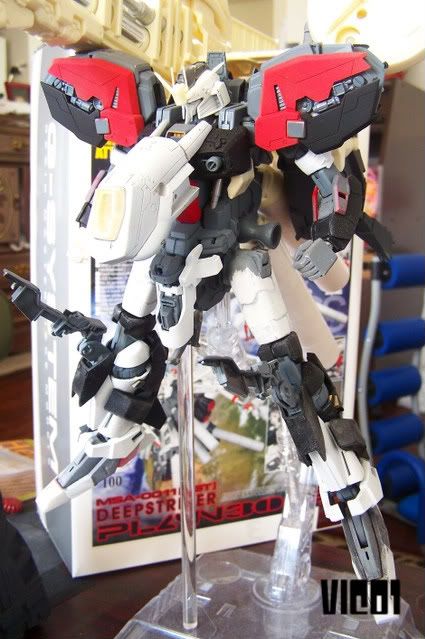
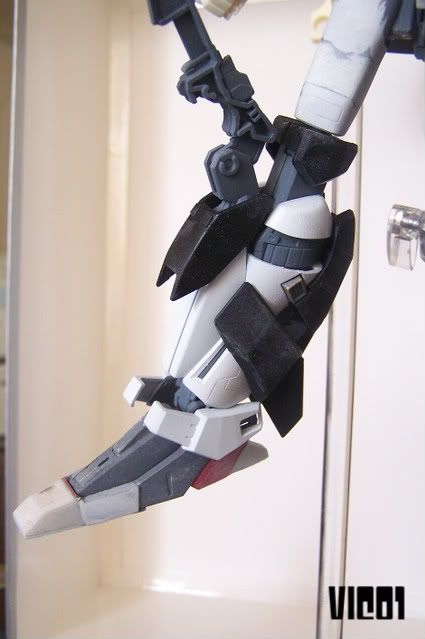
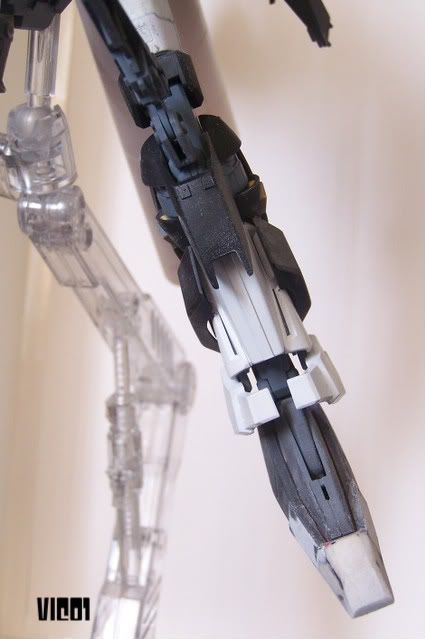
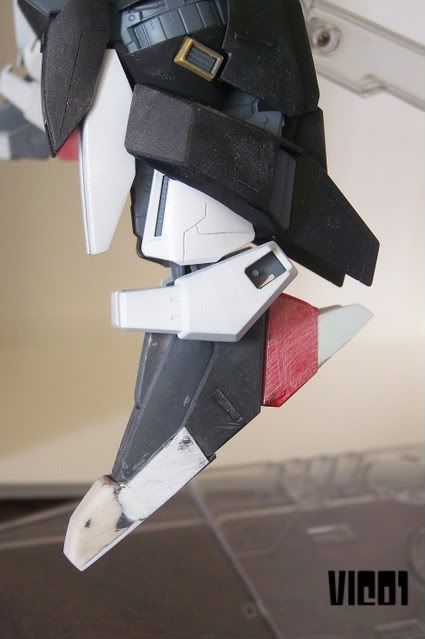
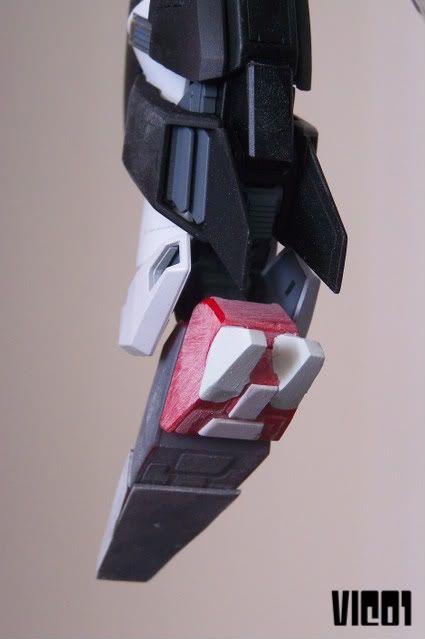
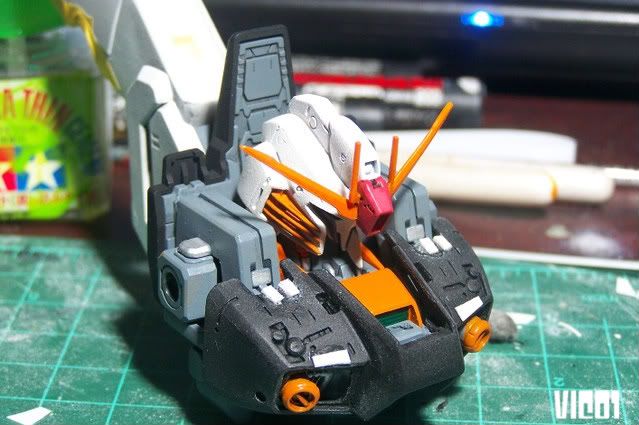
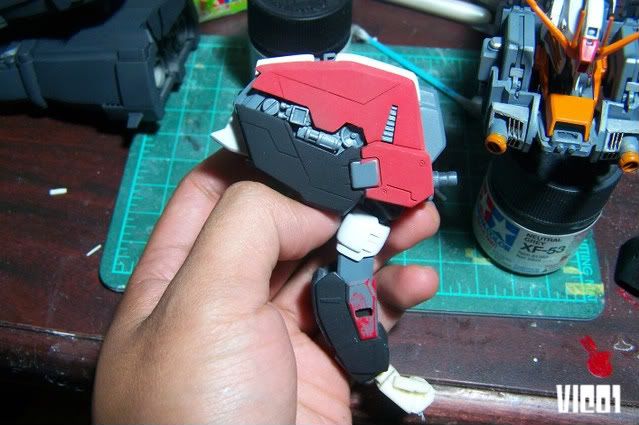
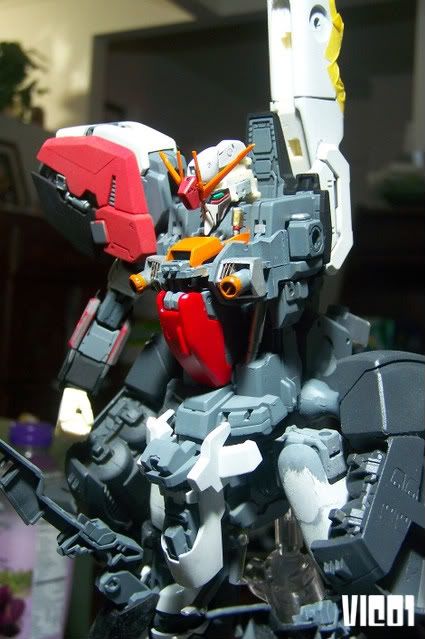
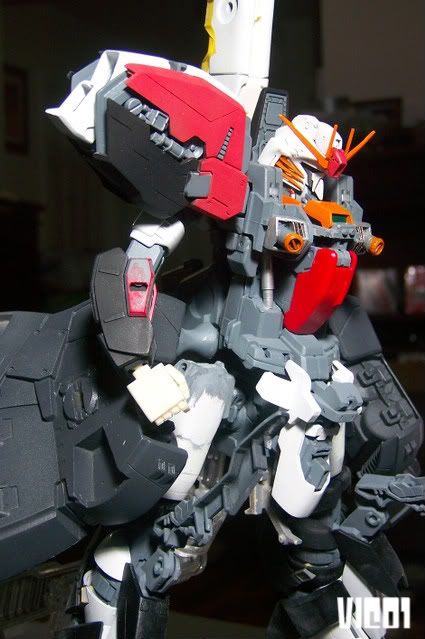
Updates!!!!! 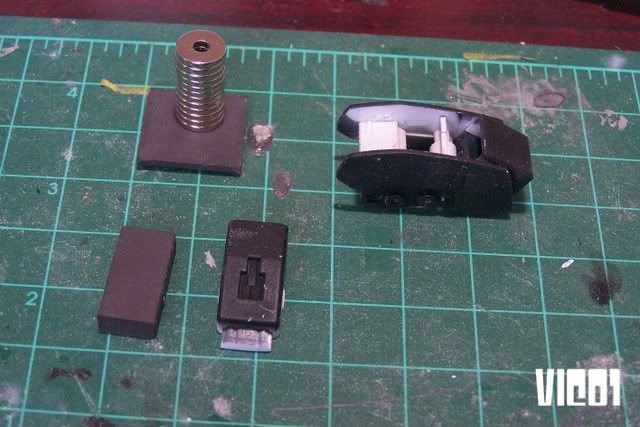 Got myself 12 strong ring magnets. Lucky it includes ceramic block magnet too. 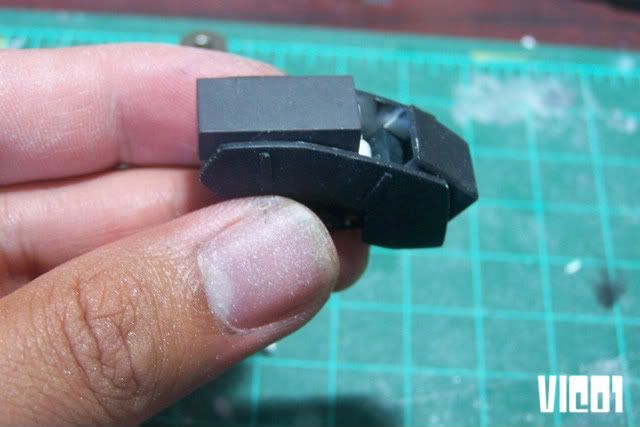 This forearm is the left side w/c I can attach the I-Field Generator. 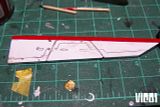 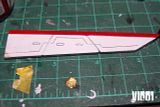 Just lining the panel lines using wash... 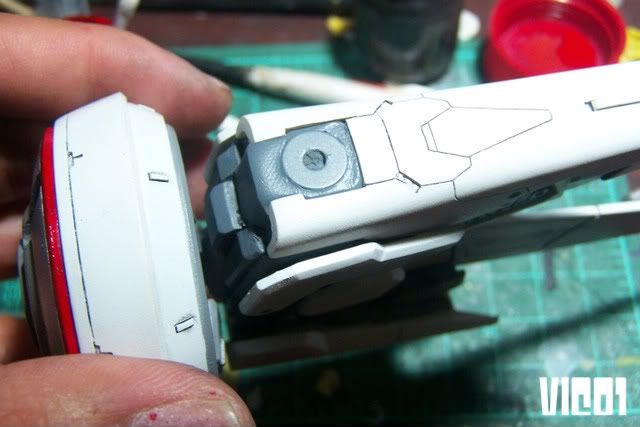 This is the ring magnet I used surrounded by putty. Actually there are two magnets in there, one below it, to make it more stronger to hold the heavy I-field. 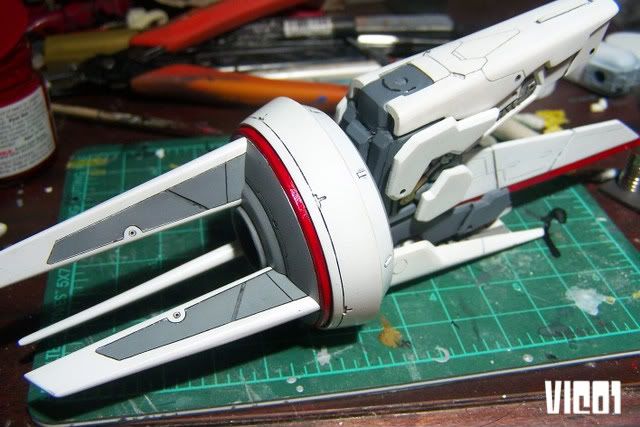 The finished I-Field Generator, minus the clear plastic in front of the LED, decals and topcoat. 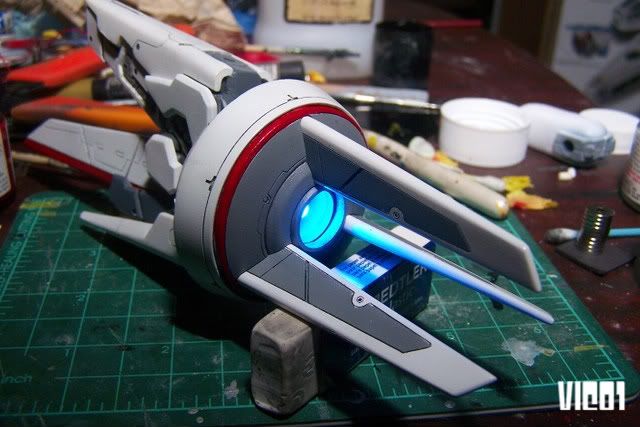 My first lights on part! 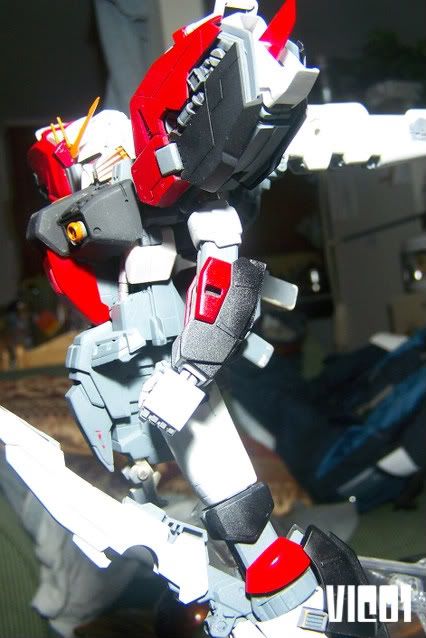 W/o the I-Field 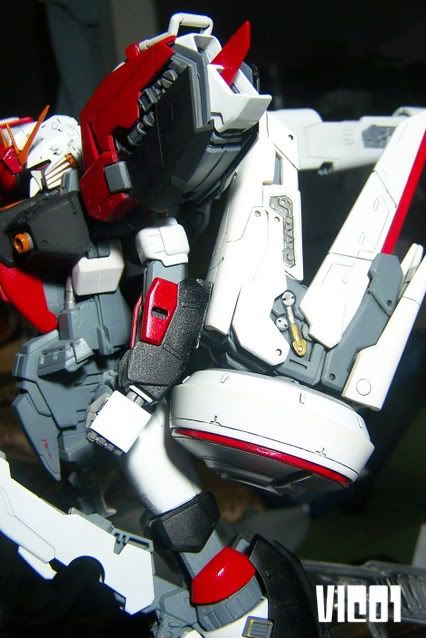 With the I-Field 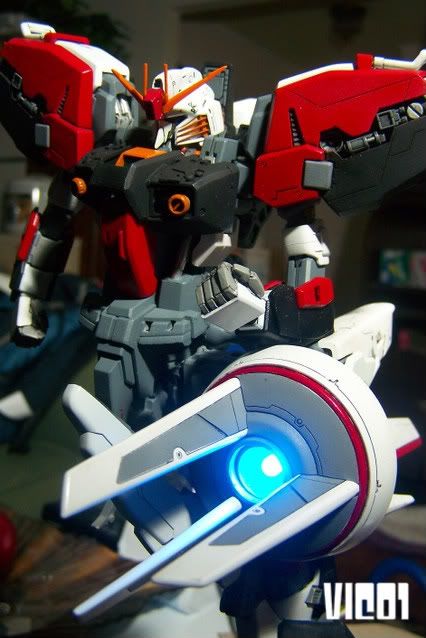 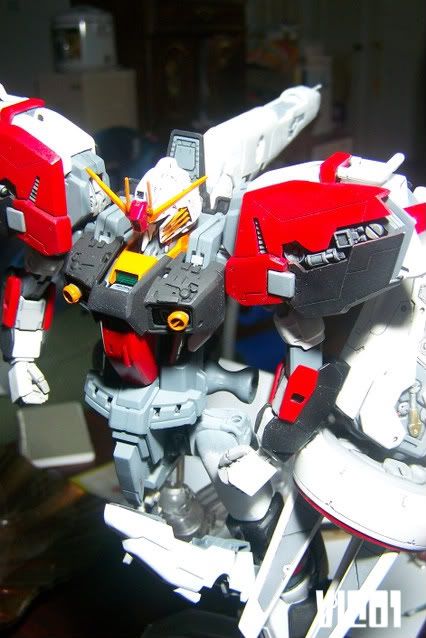 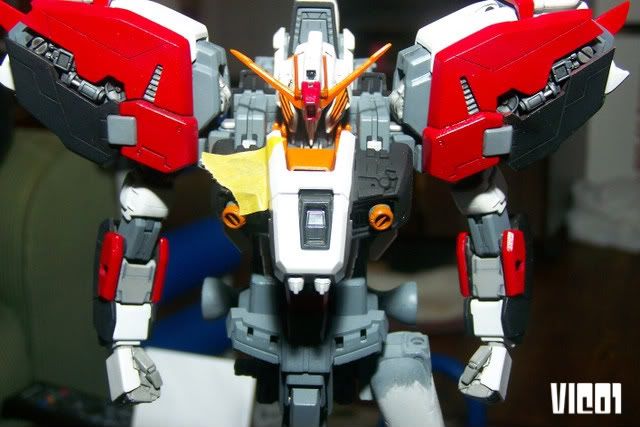 Change of plans. I decided to use the MG's mid-chest and eliminate the circuit that has a lot of LEDs. 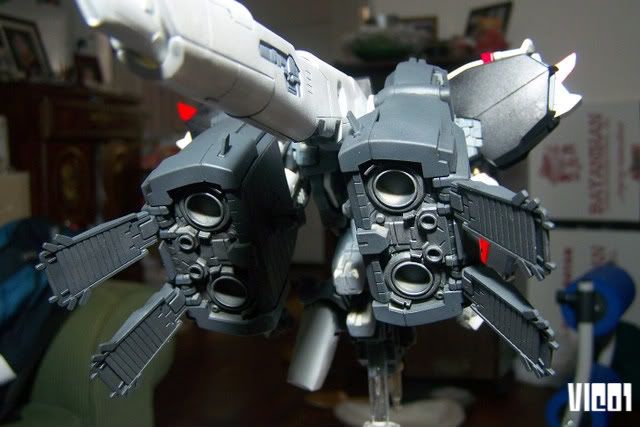 Upper Boosters almost done. Im almost finished w/ the upper parts. More to come and thanks for viewing!!! vic01 |
|
|
|
Post by shinotaking on Sept 27, 2008 4:40:33 GMT -5
very impressive work
|
|
|
|
Post by quinjester on Sept 27, 2008 15:46:11 GMT -5
Wowwow. Impressive!
So is that I-field generator being held onto the arm JUST by the magnets? That's a neat way to do it.
|
|
|
|
Post by vic01 on Sept 27, 2008 17:50:25 GMT -5
Thanks shinotaking and quinjester! Yup, just magnets. I don't want to drill and cut and use some polycaps in the left arm, since I can tell it can't hold the I-Field. It is heavy so better use strong magnets. I also need to put some locking tabs to hold it in position.  vic01 |
|
|
|
Post by supergetterv on Sept 30, 2008 16:20:59 GMT -5
Simply amazing. I like the change you made to the Mid section. Although the LED lights were kinda cool, the original mid section just look big.
|
|
|
|
Post by vic01 on Oct 1, 2008 22:56:53 GMT -5
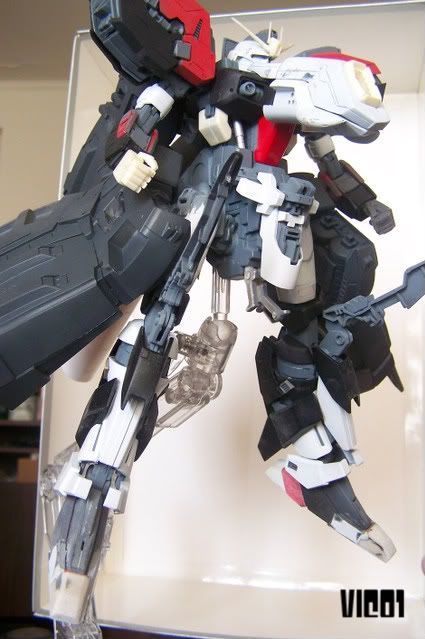
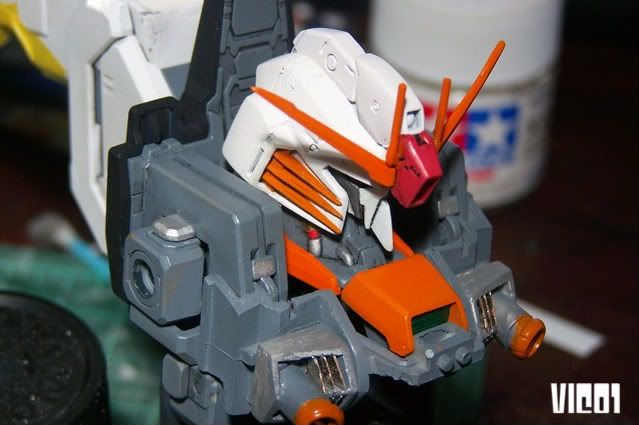
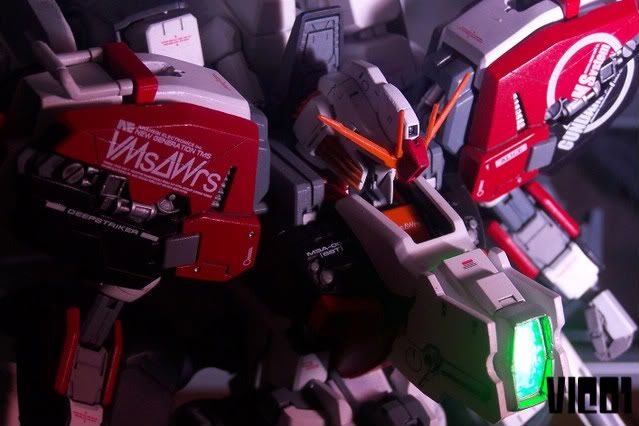
Simply amazing. I like the change you made to the Mid section. Although the LED lights were kinda cool, the original mid section just look big. Thank you! I updated it! I've been thinking what if the chest still lights up w/o using the orig G-System parts and circuit? I tried... 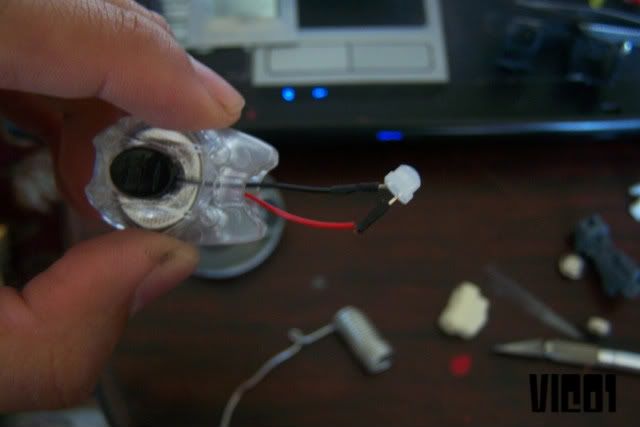 I found an ultra-bright LED light. I took off the ultra-bright LED and put a green LED that came from the original circuit of G-System. 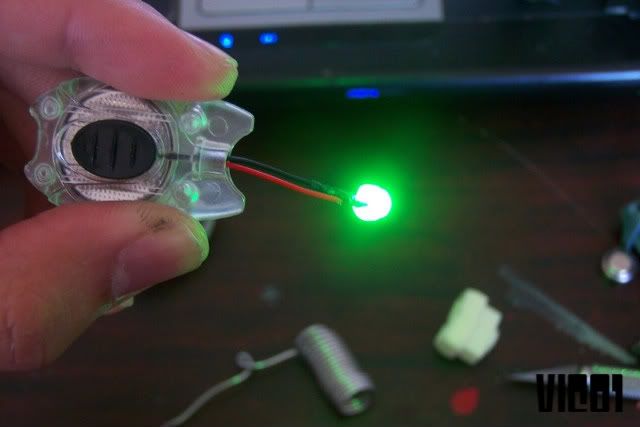 Tried it w/ 3V, but the light is not bright. Better use 6V to make the LED lights brightly! 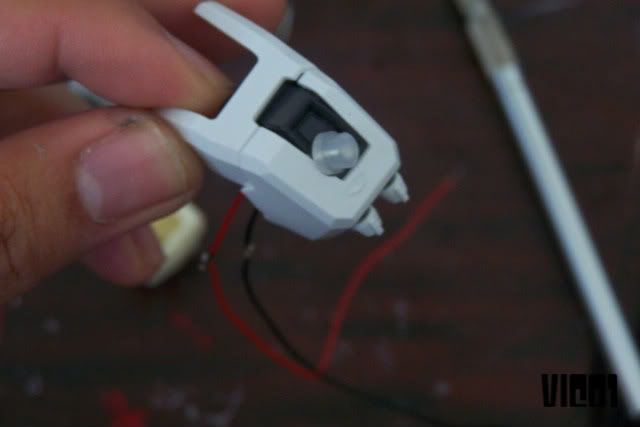 Drilled the mid-chest. 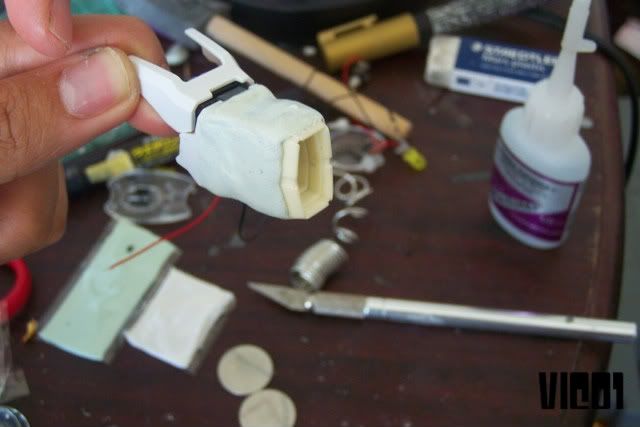 Put some tamiya epoxy on the chest and the resin part. Will make it more detailed when it cured. Will try to make it more proportional. 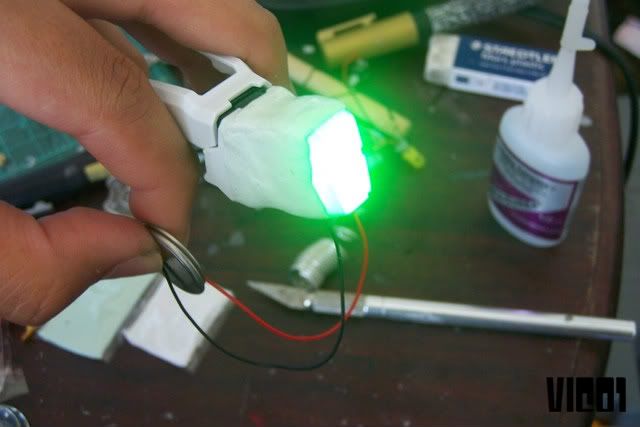 Lights on! 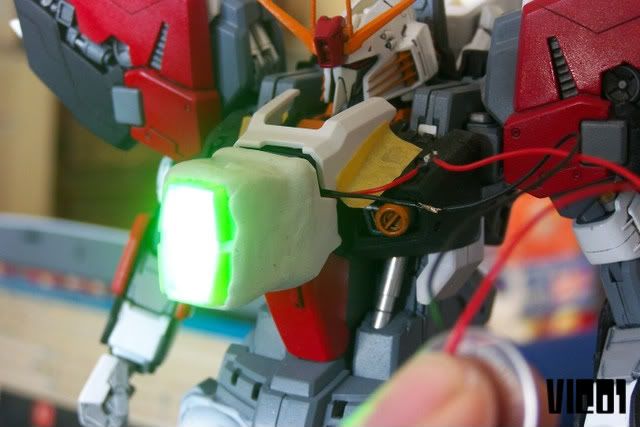 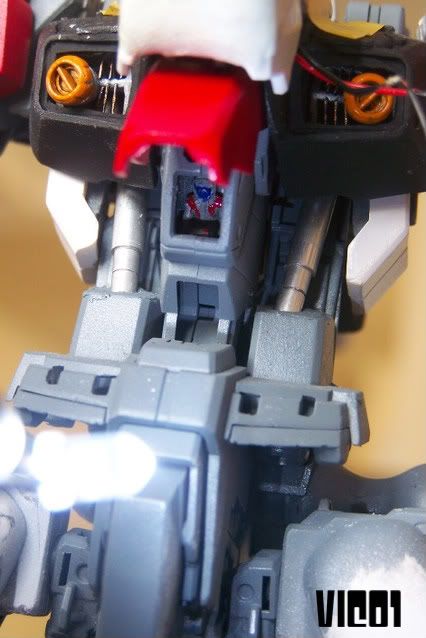 Plan to make an opening cockpit! My rule is, only one pilot for this Gundam. 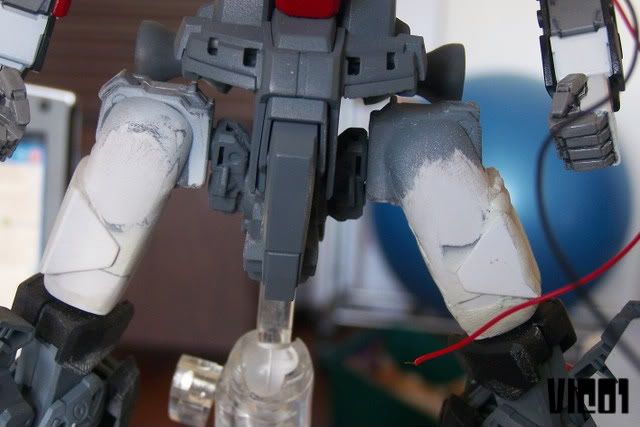 Trimming the thigh parts. 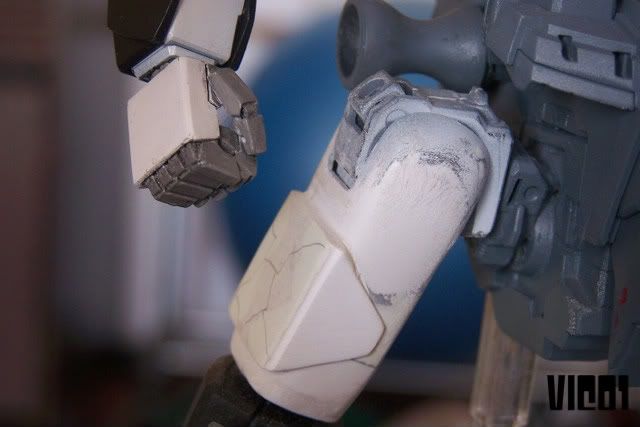 Need more sandpaper sticks.  Will strip the armor paints to make it more clean. Oh, well, busy busy. More to come so stay tune!!! Thank you for viewing! vic01 |
|
|
|
Post by arcausalteisen on Oct 1, 2008 23:19:41 GMT -5
whoa, crap this is the best model ive seen since... actually i dont know  . Anyways its really cool especially with all those LEDS. The color scheme also matches the model very well and they mix great to! I just wanted to also ask if a 12 year old like me could create a custom model like yours . |
|
|
|
Post by supergetterv on Oct 3, 2008 0:22:49 GMT -5
Will definately tune in cause I really like to see what the finished model will look like.
|
|
|
|
Post by vic01 on Oct 10, 2008 1:08:06 GMT -5
arcausalteisen: Yes, you can! Start now and learn. Be motivated. Nothing's impossible if you want it. @supergetterv: Thanks for anticipation! Almost done w/ my DS Custom... 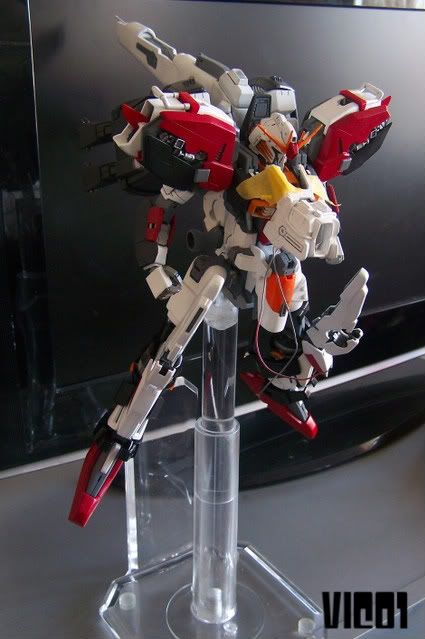 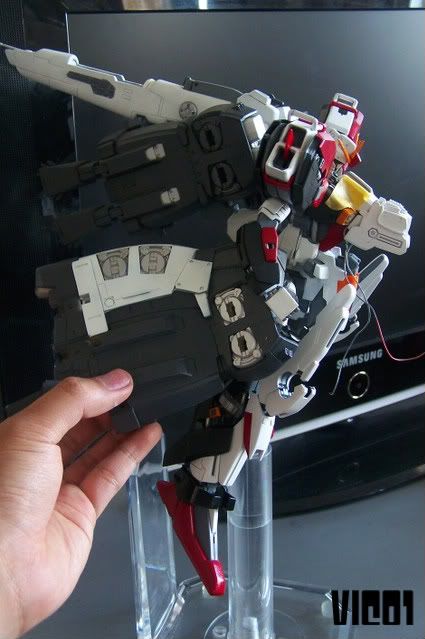 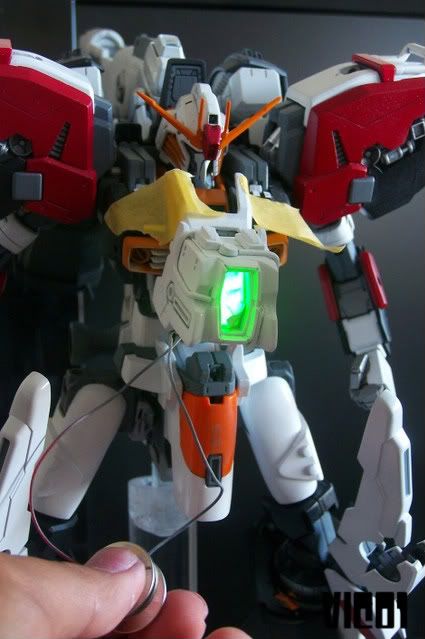 Almost done, I just need to fix and design the circuit for the chest and hide the batteries inside on one of the propellants at the back, paint a lot of small parts, boosters, the BFC, future clear coat, decals, and the finale, topcoating. Hope next week im set. vic01
|
|
|
|
Post by arcausalteisen on Oct 10, 2008 6:38:23 GMT -5
thanks very much on the reply! il start off with custom painting The model is looking very nice indeed, it looks retail . the led is coool, i was wondering if you could of done a LED head? it might be hard but i found a set of led heads (retail) on HLJ only problem is that they were discontinued  anyways really really nice model! |
|
|
|
Post by Lotur on Oct 19, 2008 8:48:38 GMT -5
parekoi i cant waaait to see this masterpiece completed ;D
lookin forward to the updates! definitely a pinoygundam mismo moment! ;D
|
|
|
|
Post by vic01 on Oct 23, 2008 3:58:48 GMT -5
One more day! 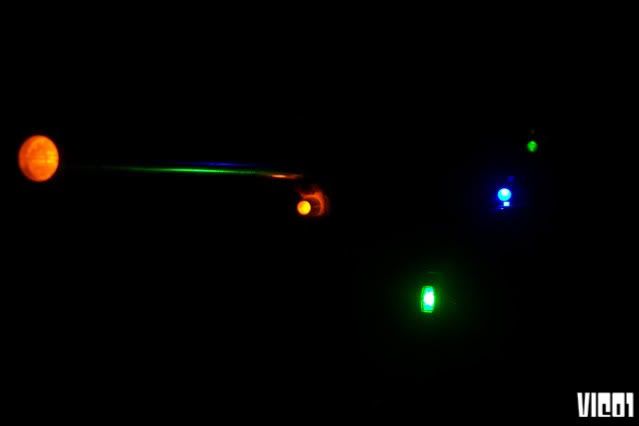 vic01 |
|
|
|
Post by Qball99 on Oct 23, 2008 7:13:32 GMT -5
Whoa! That is looking AWSOME Vic!
|
|
|
|
Post by vic01 on Oct 24, 2008 4:26:34 GMT -5
1...  Opefully I can take shots tom if time allow me. I thought I'll be free the whole day tom, but will be busy like a bee. vic01 |
|