|
|
Post by luclin999 on Oct 12, 2012 16:14:48 GMT -5
A couple of weeks ago I managed to pick up this guy from YJ : 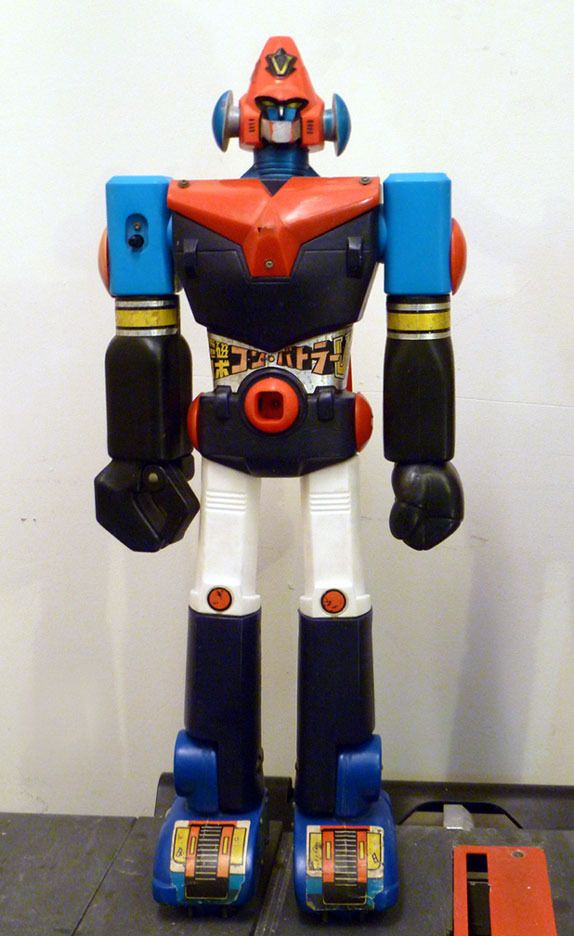  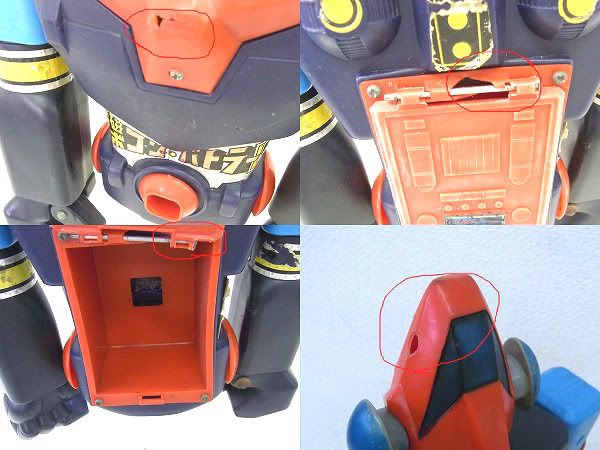 As you can see while it isn't a complete junker there are several issues which need to be addressed. ~ Clean the figure (Done) ~ Replace the missing Antenna (Working on it) ~ Acquire a replacement right shooting arm (Done) ~ Punch up the color on the faded yo-yo ~ Repair/replace the damaged red chest piece ~ Touch up the paint on the head ~ Repair the damaged rear hatch ~ Replace all of the damaged/worn decals (Decals finished ) ~ Clean up the rusty screws I've already picked up a casting of an antenna from Wes to use for a mold to make my own for the head and a repro right firing arm from him that I'll add back to the figure at the end of the restoration. It's also missing the blue roller accessory so I'll probably have to hunt that down at some point. At this point I have gone ahead and made the mold for the antenna, cleaned up the figure, removed the old decals, scanned them and begun the reproduction process. 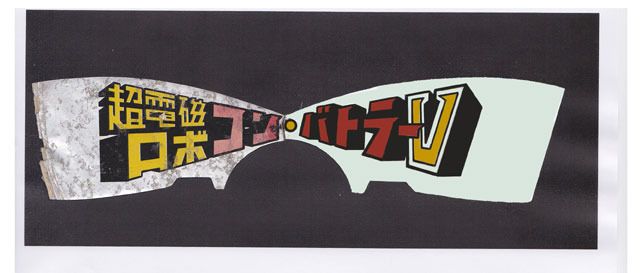 Hopefully I can make a bit more progress over the next few days. |
|
|
|
Post by bourno on Oct 12, 2012 16:38:44 GMT -5
Best with your restoration progress. Glad to be of some assistance to you on this and let me know if I can help with anything further.
|
|
|
|
Post by rodman75 on Oct 12, 2012 21:09:13 GMT -5
Nice pick up! Glad to see another Popy brought back to life. I'm sure it'll look as good as new when you're done. Keep up posted along the way.
|
|
|
|
Post by lexcars2007 on Oct 12, 2012 21:17:25 GMT -5
Super awesome friend !!! Please keep us posted, on the great repair details !!!
|
|
|
|
Post by willohio on Oct 13, 2012 0:01:48 GMT -5
Congratulations! Combatted is such an excellent Jumbo!
Looking forward to seeing your progress. Especially the decals.... I've got a reproduction set I made a while back.
Will
|
|
|
|
Post by kitsir on Oct 14, 2012 5:29:12 GMT -5
If you want Combattra repro stickers set. Please feel free to contact me. I still had one set in stock.  |
|
|
|
Post by luclin999 on Oct 23, 2012 18:24:12 GMT -5
Well actual "work", work has slowed my progress on Combattra a bit however it is still moving along. So far I have taken the figure apart, cleaned it up and begun casting the replacement antenna for its head. I've also finished putting together the repro decal sheets I made from the cleaned up versions of the originals that I was able to (very carefully) remove from the toy.  And if you were wondering where the third armband is..  I think that is about as close to the original color, luster, sheen and overall appearance to the original look from 35 years ago as I am going to get. |
|
|
|
Post by willohio on Oct 23, 2012 20:58:42 GMT -5
The decals look really nice!
Will
|
|
|
|
Post by faulkners2 on Oct 23, 2012 21:30:13 GMT -5
What kind of program and printer are you guys using to recreate these decals? What kind of paper are you using?
|
|
|
|
Post by luclin999 on Oct 23, 2012 22:58:45 GMT -5
I can't speak for anyone else, but I work on all of the image files in Photoshop and print my decals out with my inkjet and color laser printers on an assortment of different vinyl, foil and other decal papers. If you really want to get the closest match to the originals then you end up with a pile of different media types to print on.
For example, I have three different types of "silver" and two different "gold" papers/foils for just the various various belts and arm bands the Jumbos have.
Then there are the laminate sheets that can be applied over the decals to both seal in the colors as well as to adjust the degree of gloss that each set shows.
I've found that I have basically had to make up a special "recipe" of the photo files, printer type and papers used for all four of the jumbos that I have created a set for. (Dragun, Raydeen, Mazinga & Combattra)
|
|
|
|
Post by luclin999 on Oct 23, 2012 23:02:21 GMT -5
The decals look really nice! Will Thanks. I appreciate that esp. from someone like yourself who has done so many different sets of decals already. (and knows what a pain it can be to clean up the images to match the originals)  |
|
|
|
Post by kitsir on Oct 24, 2012 6:04:35 GMT -5
|
|
|
|
Post by faulkners2 on Oct 24, 2012 8:54:24 GMT -5
Thanks for the info on the stickers. One of these days I'm going to try them myself.
Kitsir -- I was looking at the Combattra restoration link you provided, which is amazing. What is the material you are using to fill in the holes and depressions on the body? Is that Sculpy?
|
|
|
|
Post by 1oldrobot on Oct 24, 2012 12:29:10 GMT -5
not sure why people associate sculpey with jumbo repair. sculpey needs to be cooked and you wouldnt want to cook any jumbo parts. also, sculpey is not very hard. epoxy fillers on rough edges of PE is good enough to grab it and is strong enough to use at least as a display piece.
but i am interested, too, in what else can be used as body filler.
|
|
|
|
Post by faulkners2 on Oct 24, 2012 13:14:40 GMT -5
I have never used Sculpy before so I don't know what is required to use it. I do, however, have some friends who do re-sculpts on action figures and they swear by Sculpy (or Super-Sculpy). I don't know how they use the stuff if it has to be cooked on those plastic action figures. I would also like to know what everyone is using on these jumbos to make these repairs, because the stuff Kitsir is using looks pretty good.
|
|
|
|
Post by 1oldrobot on Oct 24, 2012 19:46:39 GMT -5
there are tons of recent posts that go over lots of means to patch jumbos. super sculpey is great stuff as it is rigid and you can actually sculpt with it. regular sculpey is also really cool stuff, but not very good for serious sculpts as it is soft like play doh. all sculpey needs to be cooked so that makes it an auto no-no for toys its attached to. it also shrinks a little. there is a way to prevent shrinkage, but i wouldnt advise it to anyone who doesnt use oil based sculpting clay and doesnt know the trick. i think a lot of people here use paperclay to resculpt pieces and match the break lines, then make a mold of it, and make a plastic part.
i doubt folks selling repro parts up here really want to completely spill their guts on how to do it. expect magic 8 ball answers to further inquiry. lol.
|
|
|
|
Post by bourno on Oct 24, 2012 21:37:30 GMT -5
I like white, super fine Milliput. Gives you time to time to sculpt, using water and a sponge can make super smooth finish. For repairs, may not stick the best for small spots, but self cures to rock hard pretty much. For recent, big custom stuff, bondo has become a favorite with me.
I use car glazing putty quite a bit for slight surface filling, but then those are mostly on first pieces that will be painted and then a mold made of that part.
|
|
|
|
Post by 1oldrobot on Oct 25, 2012 0:35:24 GMT -5
i just turned over my magic 8 ball and it said the exact same thing.
|
|
|
|
Post by luclin999 on Oct 25, 2012 2:13:11 GMT -5
Made a bit more progress tonight and cast the antenna onto the head. 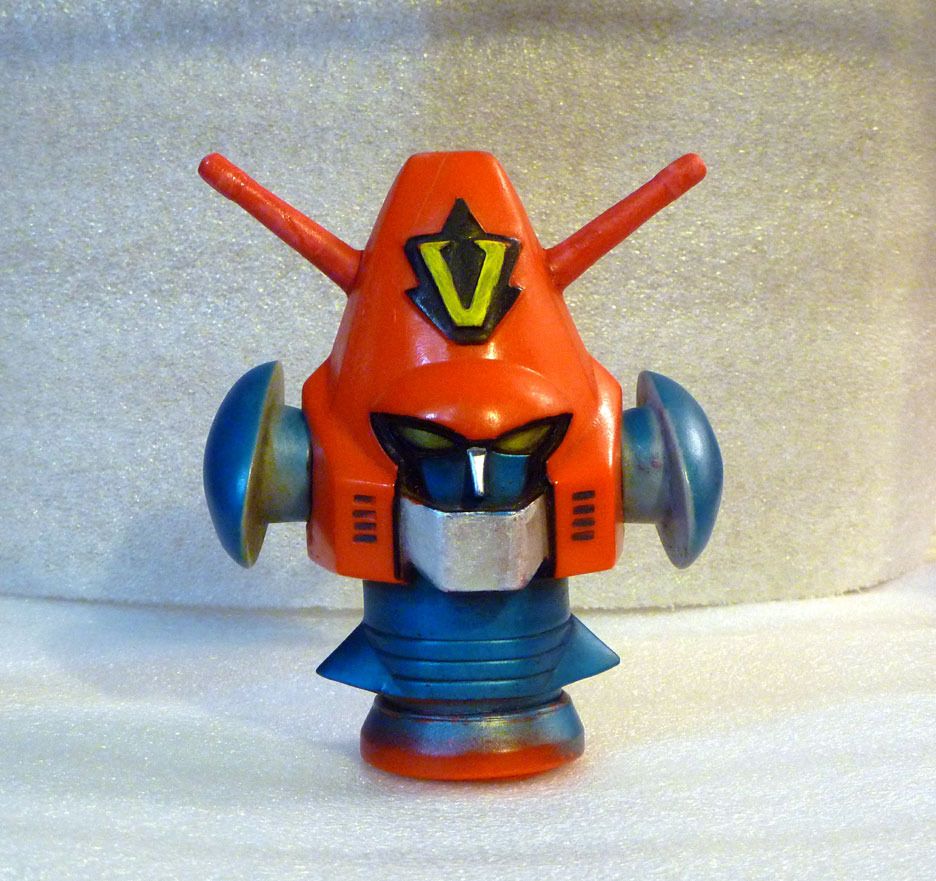 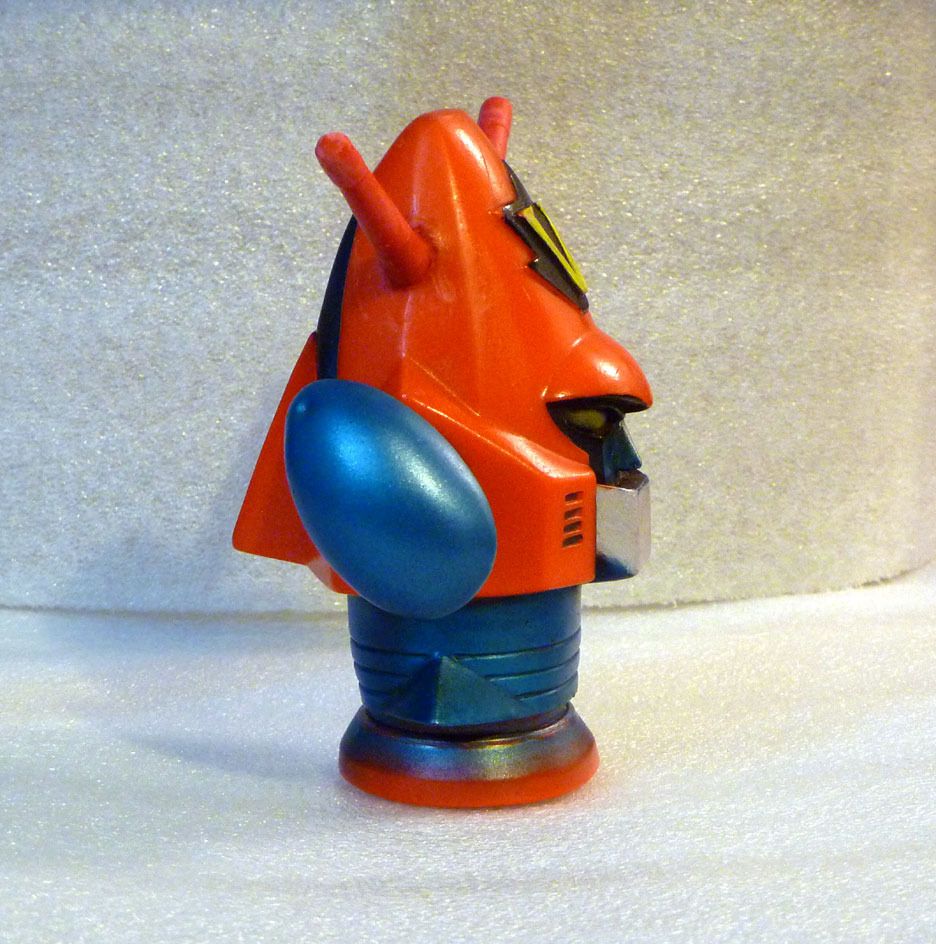 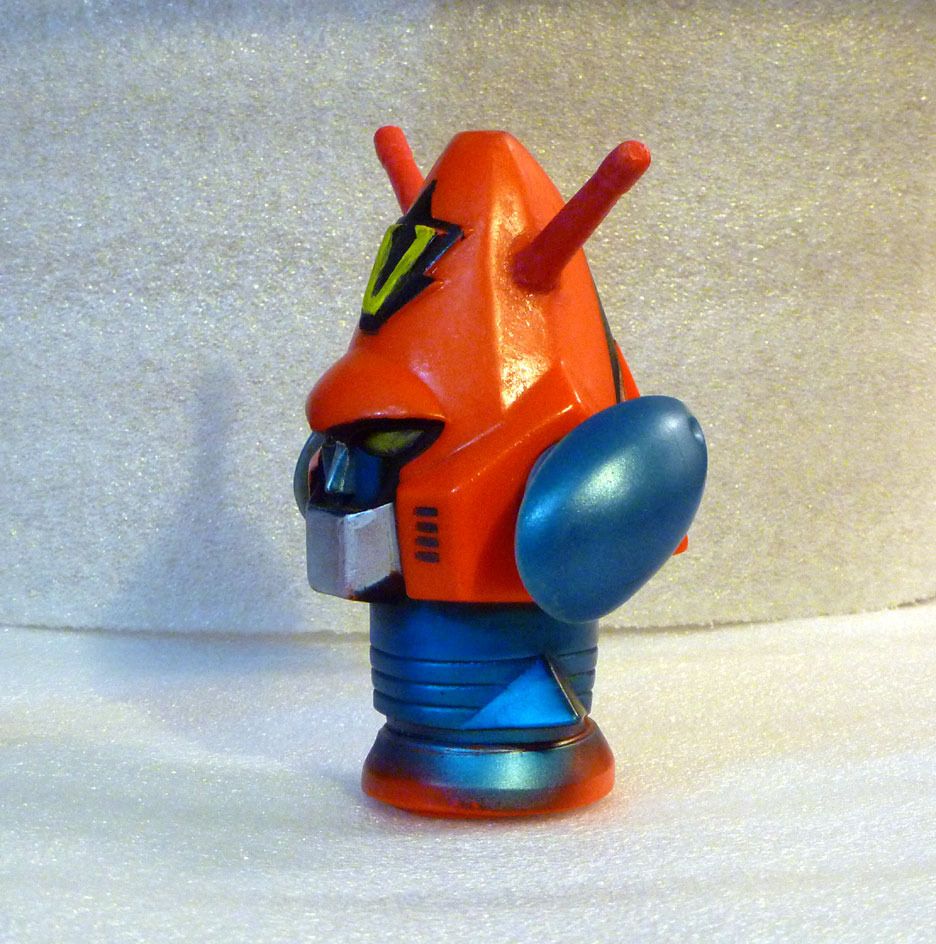 Right now I am not 100% happy with the results. (more like 85%) The Antenna look good but the place where the one on the right side of the head connects didn't turn out as seamless as I would have liked. I may end up popping out that one out and starting over with it. I also tried out my new airbrush and touched up the metallic blue-green areas on the two "earpieces" on the sides of Combattra's head. I think the color match I came up with was pretty close to the original. |
|
|
|
Post by luclin999 on Oct 25, 2012 2:19:24 GMT -5
Thanks for the link. It does help to see what other people have done in repairing similar damage to the same figure. |
|