|
|
Post by jnmx2000 on Jun 24, 2007 20:34:46 GMT -5
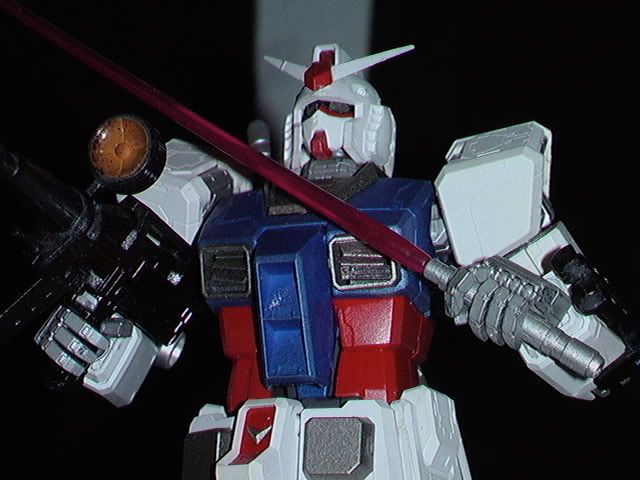
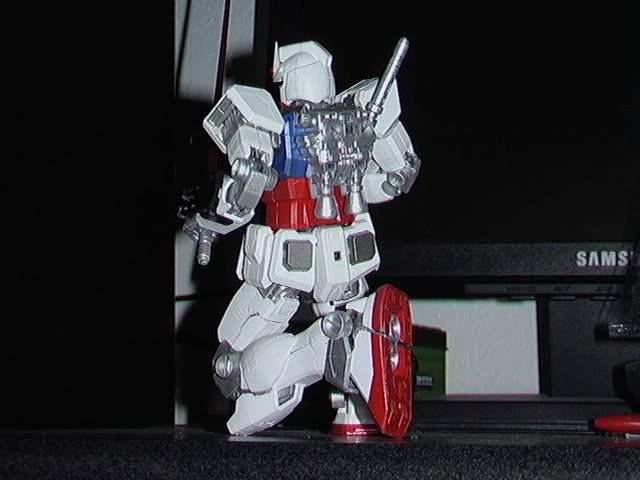
UPDATE well i just finished painting the inner frame and doing the touch ups, i did what people were suggesting for the eyes and it came out pretty cool, i painted the inner frame all metal silver and i masked out some parts on the arm that look like they are part of the frame and painted those. the last thing i have to do now is panel line, i'll save that for next week. end UPDATE well this is my first gundam, well first model kit i've ever made, i've never painted anything like this before and i've never put together a model before, so this is a first for alot for me. it's not 100% but enough so you won't notice the changes i'll make in the next few days. things i still have to do, i have to spray paint the inner skeleton the same color as the hands and neck so it all looks like it's connected. and i might or might not panel line this, maybe when i spray the inner skeleton i'll panel line, never done that either so that'll be new. i messed up alot more than i wanted to but this was a learning experiance for me. comments on my work would be nice and any suggestions would be welcomed for any future models i'm going to be doing, and i will be doing another one soon. TONS of pics. o yea, one last thing, i spray painted EVERYTHING BEFORE 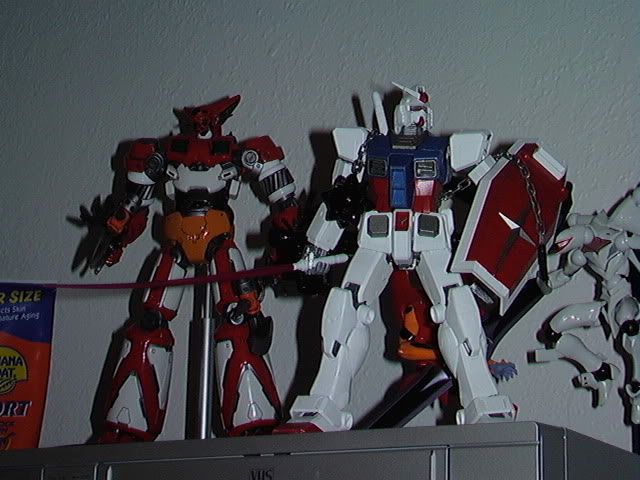  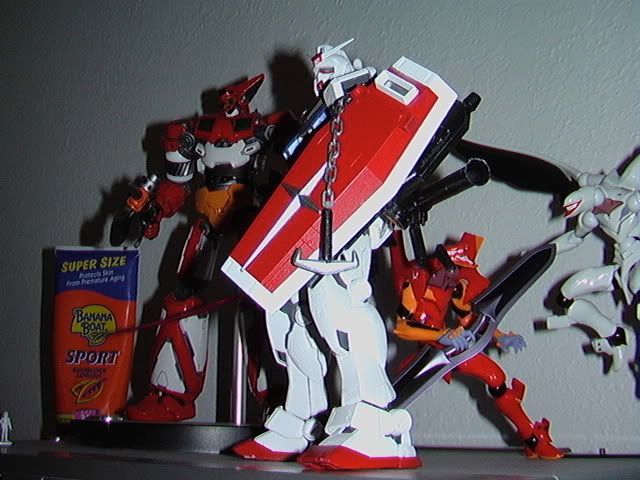 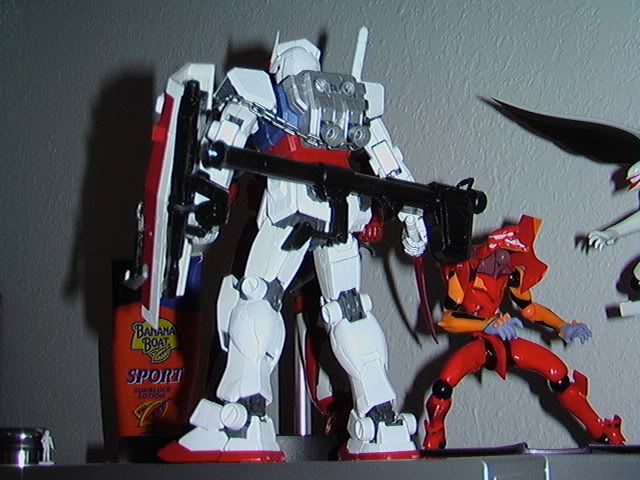 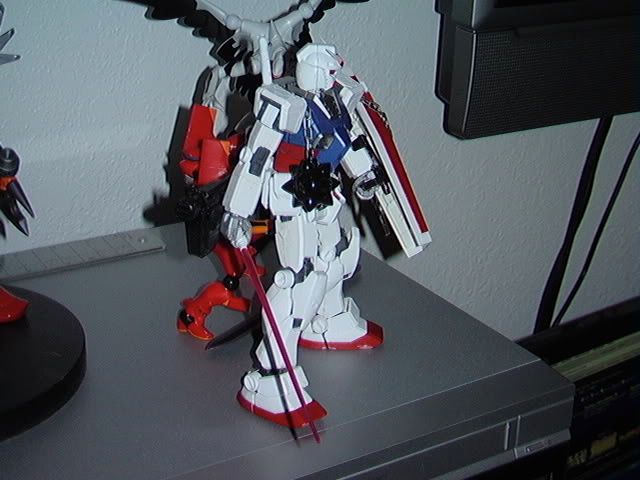 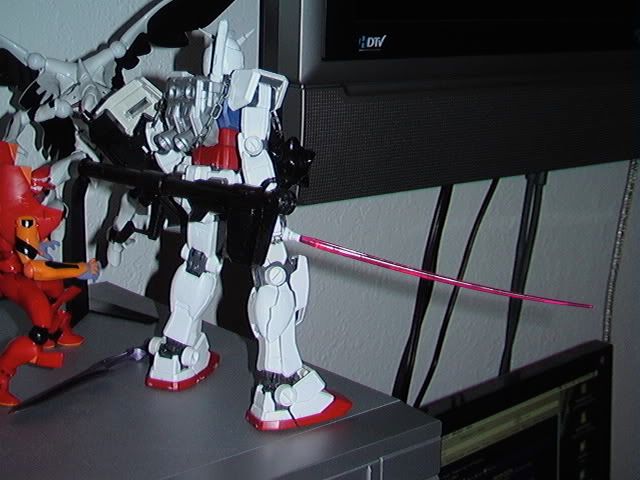 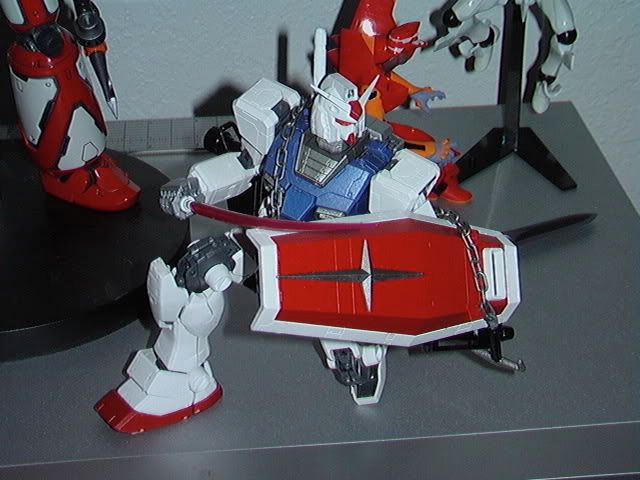 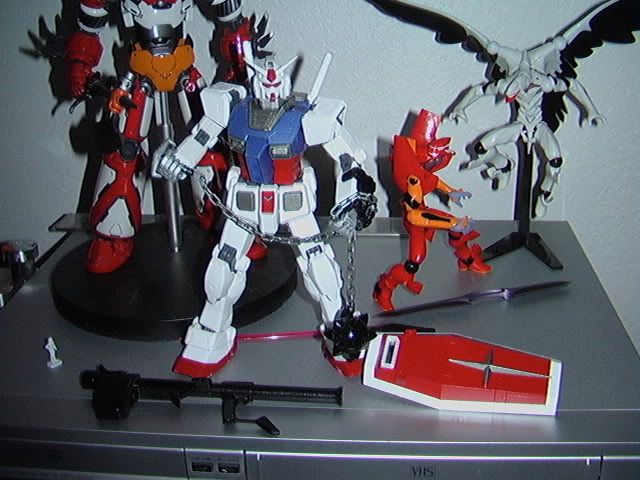   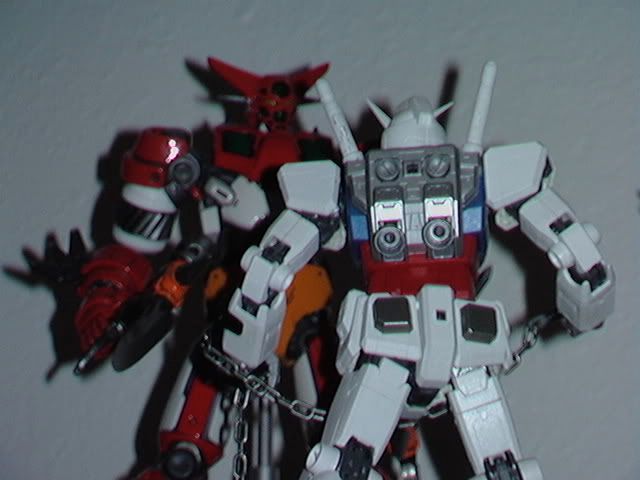 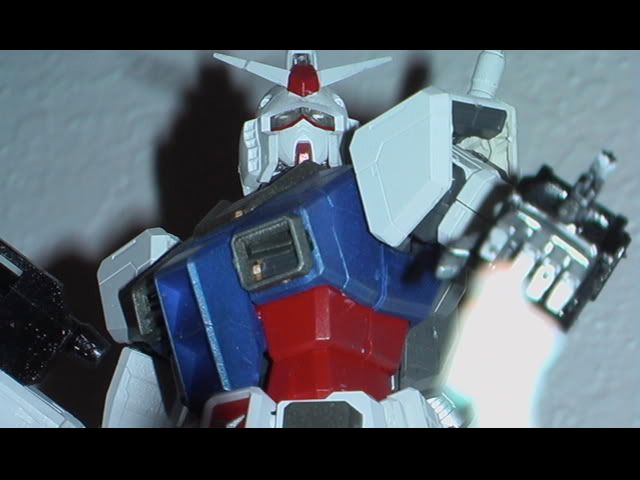 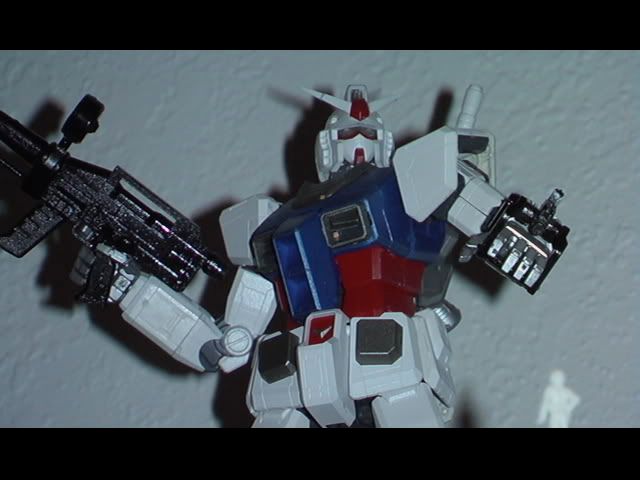  AFTER 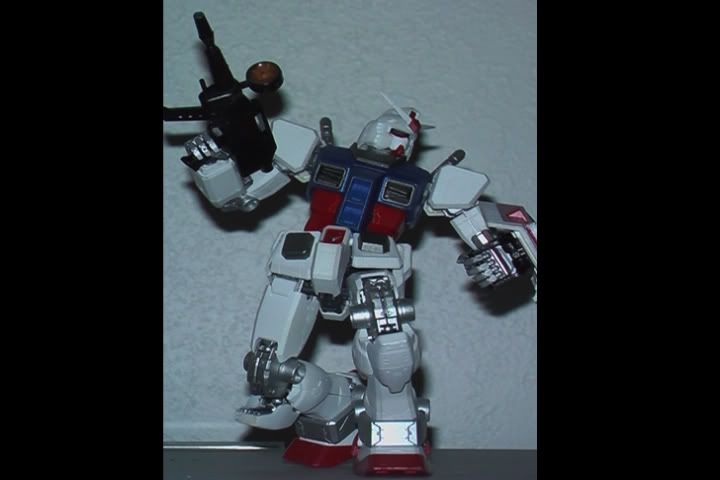 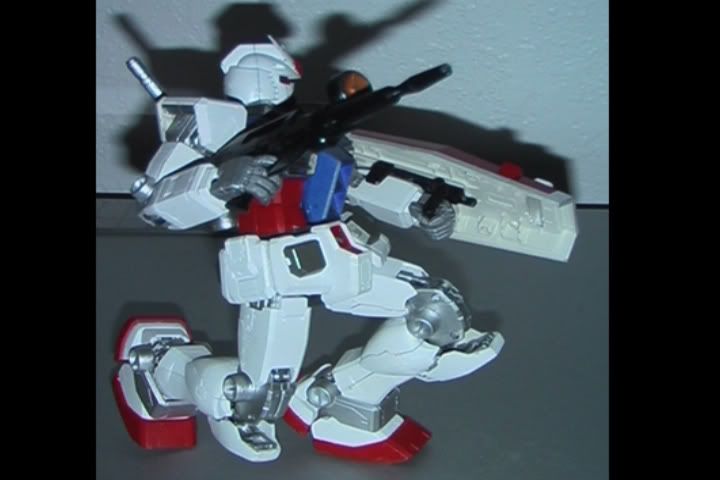 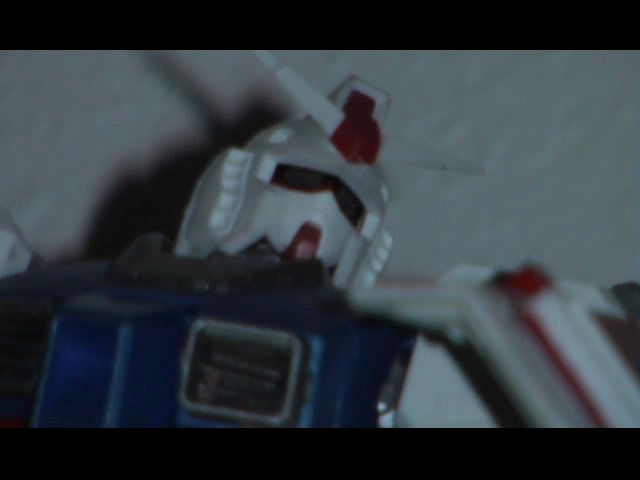 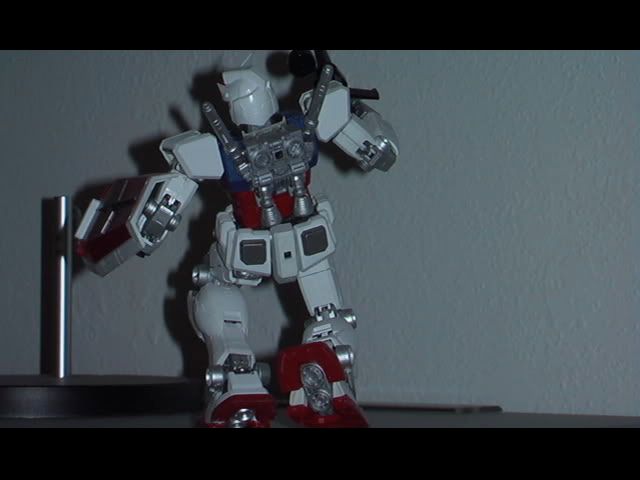 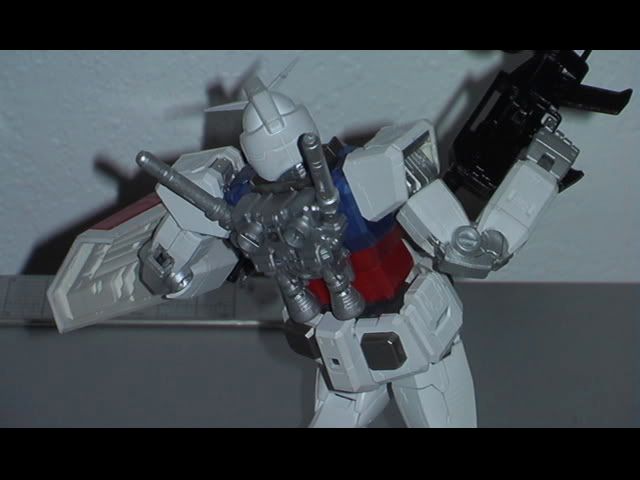 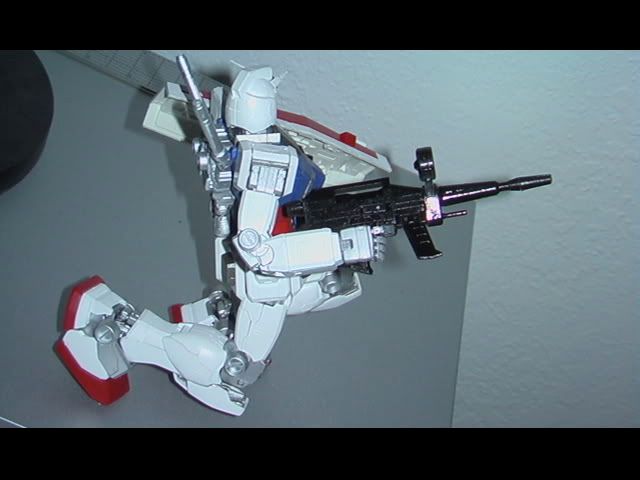 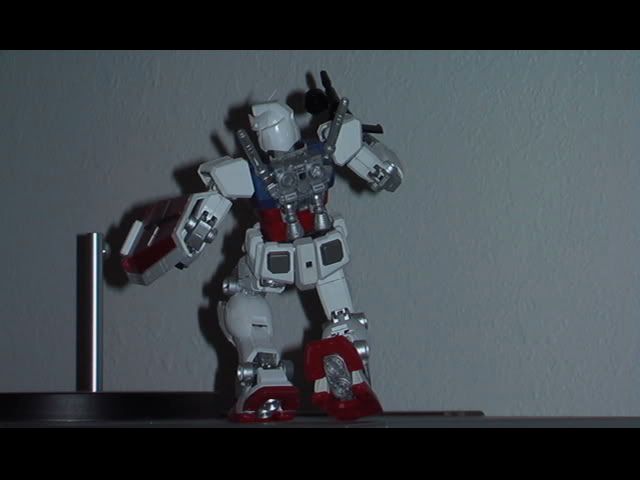 |
|
|
|
Post by jnmx2000 on Jun 24, 2007 20:49:04 GMT -5
a few more things. I did not post this in the gallery board because i wanted to talk about this with other gundam model kit builders, possible get some feedback and tips. and two, this model did not come with a sticker sheet, thats why there are no eyes, i'm think about painting them in and making the color green. and theres a bunch of paint touch ups that i have to do. also, i broke a few pieces, you can see where in the pics, hopefully with paint i'll be able to hide the broken pieces
|
|
|
|
Post by magengar on Jun 24, 2007 21:53:38 GMT -5
Dude, I'm no model-kit expert-- especially for Gundies; but you Really kicked major Ass on that model there! It looks really good, and the paintjob looks top-notch! If you could panel-line the outter armor like the interior, this model would look really Feirce! But that's up to your discretion. Either way, it still looks very good. As far as broken pieces, I can't see any nor have I noticed anything unsightly there... and I'm not gonna nit-pick to spot any possible discrepencies, although this may be helpful incase You missed anything. Leave that nit-picking to the more-seasoned Gundie modelers who'll know exactly what to look for. The eyes: perhaps some type of glow-in-the-dark green/yellow would look nice on that Gundie's face. But then, maybe the glow-in-the-dark paint might distract from the realism of Gundie's true-life mecha appearance. As a mere spectator, I rate it a high 9 for a great first effort! Continue that way, and you'll be Ace at painting models better each time! Keep it up!  zozo-Magengar |
|
|
|
Post by jnmx2000 on Jun 24, 2007 22:41:31 GMT -5
wow, thanks man. i've decided i'm going to panel line after looking at this for the past hour lol he looks nuts when in the light, i used silver metalic for the inner framer parts i've panted so far (hands, neck). and i used a metal finish for the yellow parts to give a more realistic paint job instead of the anime look (sorry to any die hards out there). and then i used metalic blue to paint all the blue so it shined in the light. the rest was just basic red, white, and my black can of spray paint was all messed up so the black came out all funky. i didn't know they made a glow in the dark paint, that would actually be cool, i think the glow in the dark would be more realistic than a non glow in the dark, a gundams eyes are light up by lights after all so i think it's a fitting way to go, any idea where i can get glow in the dark paint though? (anybody?)
|
|
|
|
Post by btoyz on Jun 25, 2007 5:41:41 GMT -5
tnx for sharing, you did a good job. continue with the panel lines, it will add more depth to the final look. the Gundam looks bland without them.
on the eyes, i guess you can paint the area around the eyes in black color. then leave the eyes unpainted for that cool HCM-Pro look. and that glow in the dark eyes is also a good idea.
Ed
|
|
|
|
Post by potchip on Jun 25, 2007 6:51:54 GMT -5
Painting really reduces the plastic feel of kits. I have used glow-in the dark paint. They are only good for glow in the dark, which is to say under normal light they have a horrible chalky texture, does not mix well with other paints (mixing simply cannot produce enough density for it to glow in the dark) and comes only in pale green. Besides, it would be impossible to share your result in a photo as glow in the dark simply does not emit enough light to register on a camera. An easy alternative is to paint the underside of the clear part in chrome silver then use clear gloss (eg transparent green/yellow or blue) on the front side. As a general rule I believe there's only one word to modelling and that is "patience". The more steps you've taken to complete a model, the better the outcome. I have sccumb to temptation to build something quickly then regret it as muckups or imperfections marr the preceeding effort. I noticed you've probably sprayed the sprue then cut them off. It saves paint but the nip marks needs to be filed/cut clean and touched up for better overall presentation. I would also break off that broken antenna and glue it to the proper place + some sanding  Hope to see works of even better quality in the future! |
|
|
|
Post by jnmx2000 on Jun 25, 2007 13:38:23 GMT -5
yea, the broken V, i'm not going to mess with that anymore, i'm just going to sand down the super glue and then paint over that. i like the idea for the black around the eyes and leave the eyes alone, maybe i'll make it all black around the eyes and make the back of the eyes silver. yea i'm going to take the model apart now in the next few days and paint all the chips from removing it from the runner and then also panel line it. i may also do some masking and do some kind of painting on the legs. i agree with the patience statement, take a good two weeks and just take your time, but now i have a better understanding of how the model kit works and my next one will look alot better. thanks for the feedback
|
|
|
|
Post by heavyarmscustom on Jul 2, 2007 21:41:07 GMT -5
hey hey
I must say that that is a wonderful first attempt Jnmx! I know th Pain of broken V-fins trust me.
for my two cents on the V problem is to get some plastic welder from a hobby shop(not glue) take it off put it on a flat surface and apply a little to the break push together and let dry. be careful of beading at the seam as you will have to sand it.
as for the eyes I do this
I take the back ground and paint it black ( as has been suggested) but I leave the eye's clean. then I go and cut out the eyes decals you get with the kit with a fresh x-acto knife or decal scissors(you can use small cuticle scissors as well) and then lift them off the backing and put it on the eye. if you have a stylus from a PDA, phone, or NES DS and run it over the decal.
I would say this is the only way to make it look good. I've tried the paint the eyes but nothing I have found comes out looking realistic. the decals look the best trust me.
also look for MICRON PENS you want a 005 pen cap size for all your panel lining needs!
just my two cents
clifton
|
|
|
|
Post by btoyz on Jul 3, 2007 1:42:02 GMT -5
...if you have a stylus from a PDA, phone, or NES DS and run it over the decal. what is a stylus? tnx in advance. |
|
|
|
Post by mannix143 on Jul 3, 2007 9:34:18 GMT -5
stylus is that stick like pen that you use for touch screens, like in some PDAs, you see them holding like a a small pen touching the screen of their PDA or some gadgets... thats the stylus
|
|
|
|
Post by btoyz on Jul 3, 2007 12:21:03 GMT -5
ah ok, tnx.
|
|
|
|
Post by jnmx2000 on Jul 3, 2007 12:57:05 GMT -5
hey hey I must say that that is a wonderful first attempt Jnmx! I know th Pain of broken V-fins trust me. for my two cents on the V problem is to get some plastic welder from a hobby shop(not glue) take it off put it on a flat surface and apply a little to the break push together and let dry. be careful of beading at the seam as you will have to sand it. as for the eyes I do this I take the back ground and paint it black ( as has been suggested) but I leave the eye's clean. then I go and cut out the eyes decals you get with the kit with a fresh x-acto knife or decal scissors(you can use small cuticle scissors as well) and then lift them off the backing and put it on the eye. if you have a stylus from a PDA, phone, or NES DS and run it over the decal. I would say this is the only way to make it look good. I've tried the paint the eyes but nothing I have found comes out looking realistic. the decals look the best trust me. also look for MICRON PENS you want a 005 pen cap size for all your panel lining needs! just my two cents clifton i like your suggestions, but the main problem is that i don't have a decal sheet, i looked like hell for it but there's nothing, so i'm forced to paint the eyes or do the paint black around the eyes and leave the eyes clear, which sounds cool, thanks for the tips, i haven't worked on the kit since i took these pics, hopefully next week i'll get some free time and i'll get going on finishing this guy off, can't wait to see what he'll look like finished |
|
|
|
Post by Foresight42 on Jul 3, 2007 13:21:08 GMT -5
I've read that for the eyes, you should paint the back of the eyes (the part facing the inside of the head) a shiny silver and then the eyes a translucent green or yellow (depending on the gundam), applying the black outlines last. The pictures that I've seen look pretty good. I've never tryed it myself because I don't have the time or materials to paint my gundams. Maybe once I graduate college.
|
|
|
|
Post by jnmx2000 on Jul 15, 2007 18:33:12 GMT -5
|
|
|
|
Post by btoyz on Jul 21, 2007 18:06:36 GMT -5
now it needs panel lines.
|
|
|
|
Post by Bazookafied on Aug 8, 2007 12:28:16 GMT -5
I needed panel lines awhile ago.
|
|