|
|
Post by gravewolf on Dec 8, 2013 14:49:43 GMT -5
I've been wondering how sturdy is 3d printed plastic compared to abs on our figures. It all depends on the 3D process and what resin or filament is used. Some of it is as strong or stronger than most abs plastic, but not always. Clear parts tend to be more brittle. Also if you look at the white printed parts of mine, they chip easily. The green hand parts and the gray wing parts are fairly strong. Most of the common white or black material used in SLS printing is really strong but not great at capturing detail. For the next while I plan on using the imaterialise.com material called "prime gray". It's stronger than most high detail stereolithography SLA materials but not as expensive. Great for details and great for figures. I guess the best way to make a durable figure is to just print it with a single type of durable plastic and then painting it. Sucks to hear that some of parts are chipping but it's not a problem since you can have these parts printed again. 3d printing is still at it's infancy so I guess there's gonna be a lot more improvement with the process and materials in the future. I just hope that it matures at a fast pace cause that would mean more affordable, faster, higher detail and reliable printers. |
|
|
|
Post by xiombarg on Dec 9, 2013 17:58:20 GMT -5
It all depends on the 3D process and what resin or filament is used. Some of it is as strong or stronger than most abs plastic, but not always. Clear parts tend to be more brittle. Also if you look at the white printed parts of mine, they chip easily. The green hand parts and the gray wing parts are fairly strong. Most of the common white or black material used in SLS printing is really strong but not great at capturing detail. For the next while I plan on using the imaterialise.com material called "prime gray". It's stronger than most high detail stereolithography SLA materials but not as expensive. Great for details and great for figures. I guess the best way to make a durable figure is to just print it with a single type of durable plastic and then painting it. Sucks to hear that some of parts are chipping but it's not a problem since you can have these parts printed again. 3d printing is still at it's infancy so I guess there's gonna be a lot more improvement with the process and materials in the future. I just hope that it matures at a fast pace cause that would mean more affordable, faster, higher detail and reliable printers. The white material isn't too bad if your parts are fairly thick, but if you drop them just right on a hard floor they can chip or shatter. 3D printing has come a long way just in the last year. Some places can even print in steel now. It's amazing how much printers have gone down in price. Printing costs at a lot of places have gone down as well, especially in Europe. |
|
|
|
Post by xiombarg on Dec 10, 2013 12:36:30 GMT -5
So going through the robot design process I've come to a couple of conclusions that were eye openers to me, like why there are so many Gundam-ish robots out there, and why there aren't as many cool and refined looking contemporary robots out there.
I was being really critical about my robot a couple of weeks ago and asking myself why I couldn't just instantly have something look as cool as Mazinkaiser, and suddenly it hit me... Mazinkaiser is part of a 30 year evolution of a design that started out as GA-01. Even the original Gundam was designed roughly seven years after the first run of super robots, and he was far from the refined form of Gundam RX-78-2 that we think of today.
So contemporary designers use robots such as Gundams as their archetypes not just because they might like the Gundam design, but because the Gundam evolution has already worked out a lot of the shape and proportion issues that were faced by those original designers decades ago. Realizing this was a nice relief to me. I more or less designed my robot from the ground up, using some inspiration here and there, but not using design and proportions from other robots.
Going forward I'm going to try and keep this evolution process in mind and pay more attention to robots that have already gone through these hurdles in their proportions.
|
|
|
|
Post by xiombarg on Feb 7, 2014 13:51:22 GMT -5
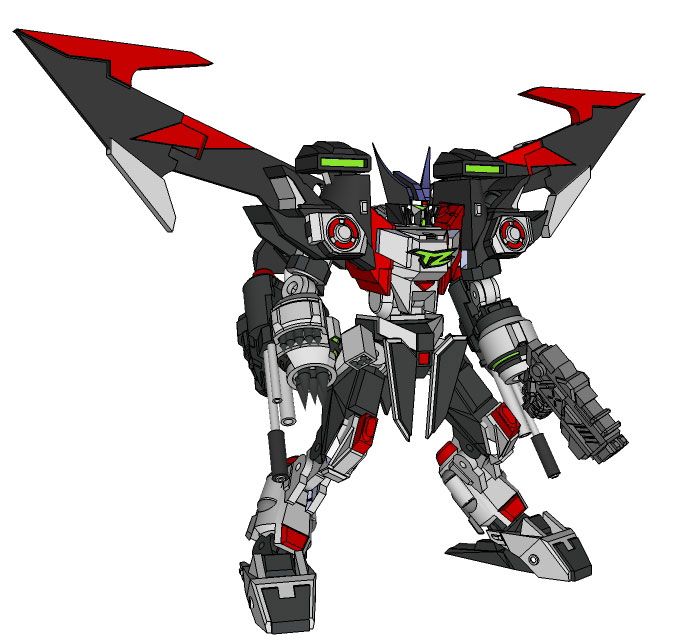
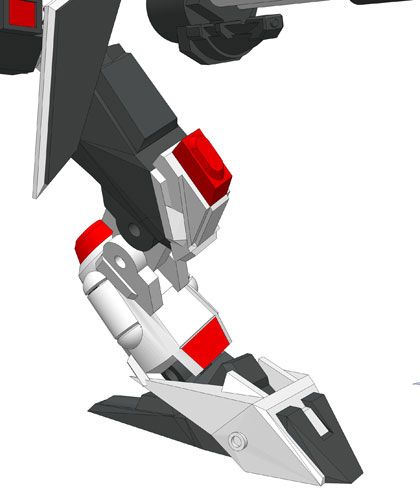
This is an updated 3D image. I've been going through the whole design and fixing things I didn't quite like about it. Some parts have had a complete overhaul and others have only had the proportions adjusted. I was unhappy with how the shoulders looked when I built the figure in real life. Even though it may not be apparent in this image, the shoulders are significantly smaller. They are still relatively big, which is what I wanted to begin with, but I didn't want them as clunky as they were previously. I also wasn't happy with the previous missile hatch design on the shoulders. Other fixes include: Smaller feet and more boxed in shape Knee design has totally changed Torso and chest area is significantly different Changes I have not yet made: Head will be changing a bit the attached gun housing on the forearm will be significantly different Any comments/ suggestions are appreciated. I'm going to keep modifying this guy until I'm completely satisfied with the results. Unfortunately I've made molds for all the old designs and casted tons of parts, but truthfully I really enjoy the process and I can always reuse silicone from the old molds, so it's not that big of a deal to me to be back to revamping again. At this rate I should have my ideal figure by 2020! Lol.  |
|
|
|
Post by magengar on Feb 9, 2014 3:27:00 GMT -5
I like your take on the whole anime thing about robot designs, you've pretty much nailed it spot on comparing the classic robot designs to those of modern-day anime robots. I also admire that you're consistently putting a lot of work into the evolution of your robot design, seeing its potential for further development rather than be distracted by any possible limitations to what your robot can be... Most robot designers will create a character, and assume the final draft as the "finished product", thus conforming to it as an absolute identity. That's fine if it were an Astroboy or Tetsujin robot character. But your robot there is a complex mecha with the potential to embody current and future technologies here in this world and in other civilized galaxies. You've given it the flexibility to become its whole self or to expand as part of a greater military mechanized force. That's what I'm seeing when I look at it. You've laid down a very good foundation with your robot. Keep it up!  zozo-mag |
|
|
|
Post by bourno on Feb 9, 2014 17:47:59 GMT -5
I'm thinking of changing my thigh/knee design. I liked my other knee design as it looked on screen, but I don't like it as much in model form. So I'm thinking of going with this...  I am decently impressed with your work using Google SketchUp. I may have to play with it after I get a 3d rendering done. I am using ViaCAD, and is mainly tailored for CNC or similar type renders. I was liking it initially, but has some quirks when doing subtractions and I don't believe I can snap items together to see how they interact with each other. Do you have a list of "add-ons" for the main ones needed to start a project like you have been doing? Some fantastic articulation movement with your piece. Thanks for sharing and I need to watch this thread more often. |
|
|
|
Post by xiombarg on Feb 9, 2014 22:30:24 GMT -5
I am decently impressed with your work using Google SketchUp. I may have to play with it after I get a 3d rendering done. I am using ViaCAD, and is mainly tailored for CNC or similar type renders. I was liking it initially, but has some quirks when doing subtractions and I don't believe I can snap items together to see how they interact with each other. Do you have a list of "add-ons" for the main ones needed to start a project like you have been doing? Some fantastic articulation movement with your piece. Thanks for sharing and I need to watch this thread more often. Here are the main tools I use in three separate lists. First list are standard tools. Second list are right mouse click tools. Third list are the plugins. Standard ToolsPencil tool Push Pull tool Scale tool Move Tool Axes Tool - understanding this is critical Solid Tool set Styles Tool set Views Tool set One other thing to note is that to turn the perspective on/off is listed under the "camera" drop down menu. Right Mouse Click ToolsMake Group (and Explode)- understanding this is critical Flip Along Intersect Faces - it's critical to know when you need to use this instead of using the Solid Tools Hide Show Hidden Geometry PluginsVertex Tools Tools on Surface Edge Tools - the split faces tool is a must Extrusion Tools Joint Push Pull Round Corners Curviloft BZ_Toobar Artisan - mostly for organic modelling, but the knife subdivide is handy all the time. Jim's Custom Toolbar - Once your robot starts to get complicated, this plugin is absolutely critical. I use it to have buttons for the following menu option: "show hidden geometry", "camera perspective", "hide selected geometry", and "hide rest of model" Almost all these plugins are FREE and can be found at sketchucation.com under the resources menu where you will install the "plugin store download" and then search for them by name. |
|
|
|
Post by xiombarg on Feb 26, 2014 21:43:57 GMT -5
One other awesome plugin I should have added to the above list is called Vertex Tools. It costs $20 but it's an absolute must. I'll edit the list and stick it in there.
|
|
|
|
Post by xiombarg on Feb 26, 2014 21:48:20 GMT -5
|
|